1600 Lumen Trionic LED Front Light with Battery Pack

This manual both shows how you attach the light holder and the light on a Walker (left column below) and also how you attach them on a Veloped (right column below).

In the left-hand photo, A shows the holder attachment parts for a Walker (2 screws + 2 washers). B shows the holder attachment parts for a Veloped (1 screw + 1 knurled nut + 1 nut).

1600 Lumen Trionic LED Front Light with Battery Pack

Attaching the Light Holder

Instructions for a Walker
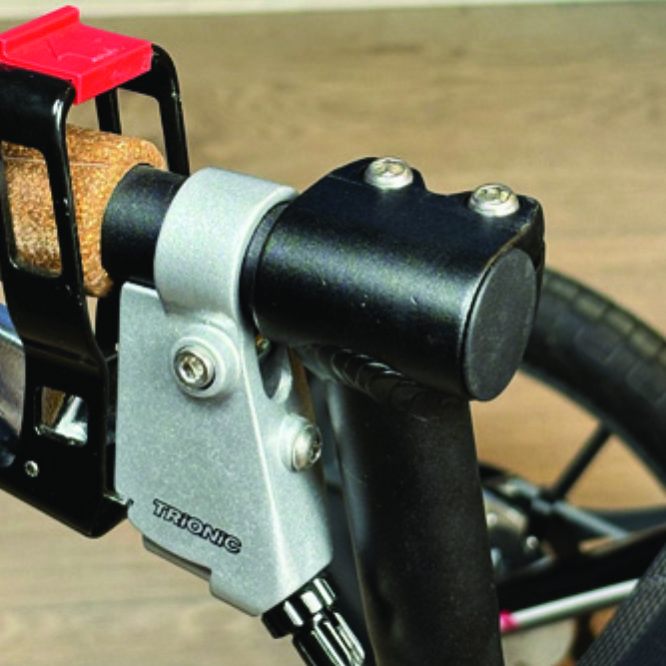
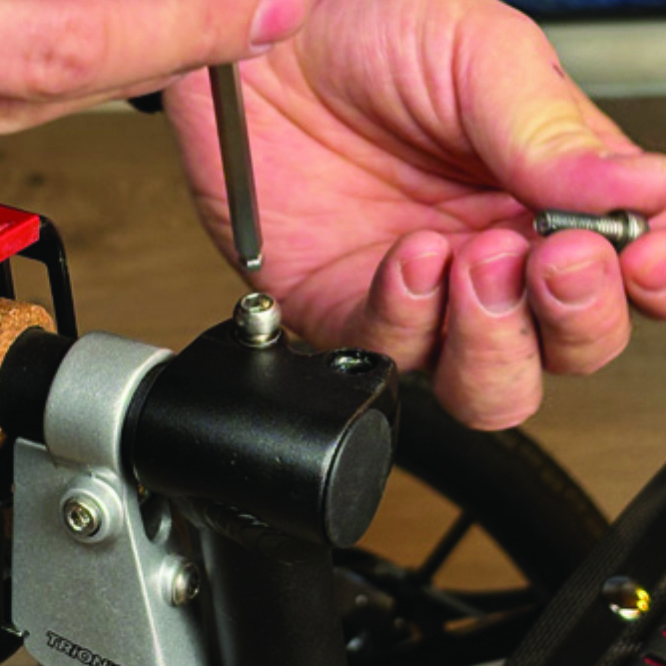
On top of the black semi-vertical tube, locate the two screws that clamp the grip tube, situated in front of the brake lever.
A1. On top of the black semi-vertical tube, locate the two screws that clamp the grip tube, situated in front of the brake lever.
Loosen both screws with the 5mm allen key included with the LED light.
A2. Loosen both screws with the 5mm allen key included with the LED light.
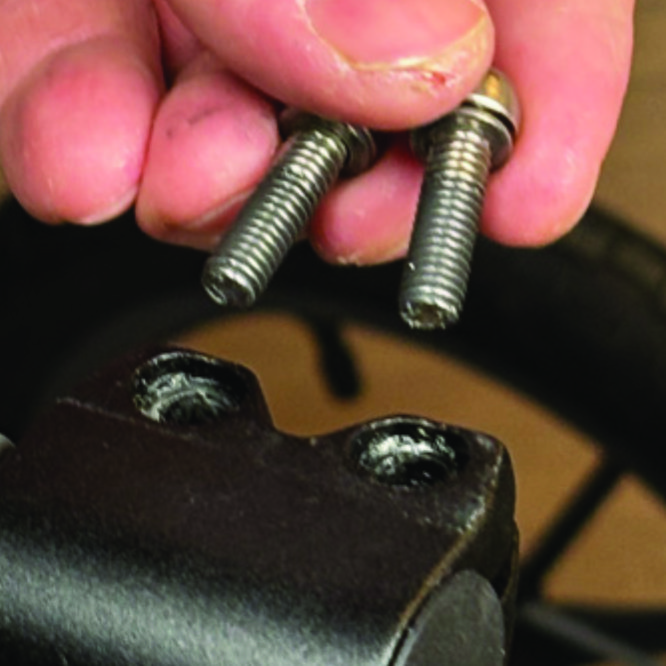
Remove the two screws from the grip clamp.
A3. Remove the two screws from the grip clamp.
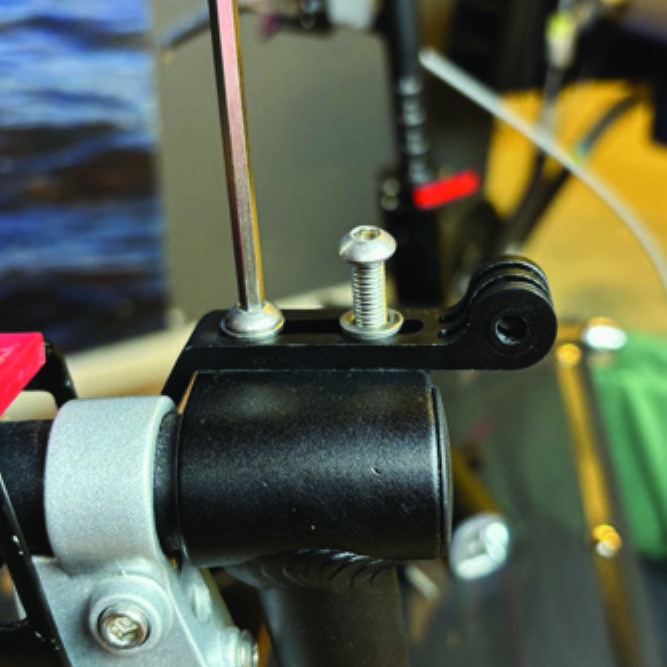
Place the light holder on top of the grip clamp, with its circular and slotted light attachment pointing forwards and upwards. Enter the two screws with washers into the holes of the clamp.
A4. Place the light holder on top of the grip clamp, with its circular and slotted light attachment pointing forwards and upwards. Enter the two screws with washers into the holes of the clamp.
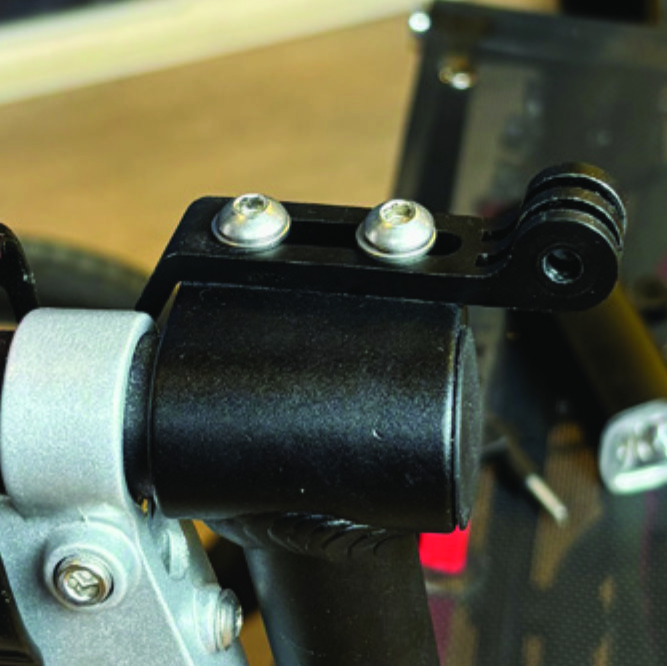
Tighten the two screws with the 5mm allen key. NOTE: It is important that you tighten the screws properly as they secure the grip tube with its rubber grip and brake lever.
A5. Tighten the two screws with the 5mm allen key. NOTE: It is important that you tighten the screws properly as they secure the grip tube with its rubber grip and brake lever.

Instructions for a Veloped

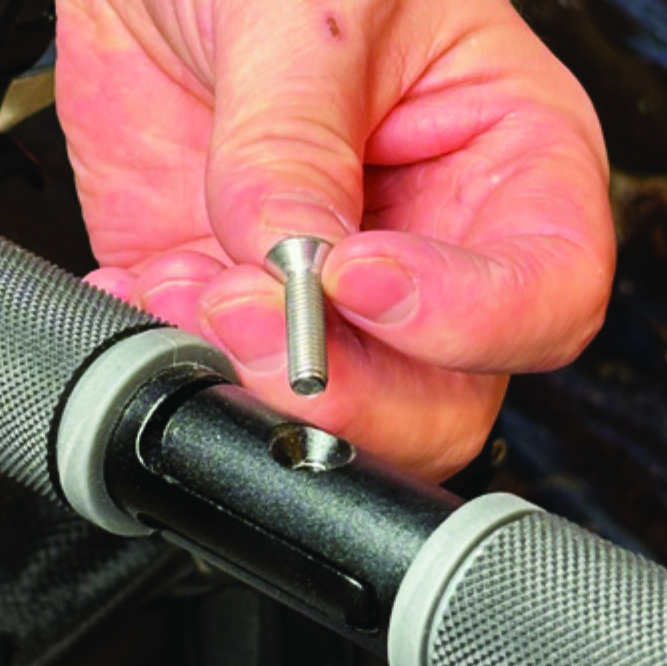
Locate the screw at the center folding hinge of the U-shaped grip bar of the Veloped. Unscrew the screw with the included 4mm allen key and remove it.
A1. Locate the screw at the center folding hinge of the U-shaped grip bar of the Veloped. Unscrew the screw with the included 4mm allen key and remove it.
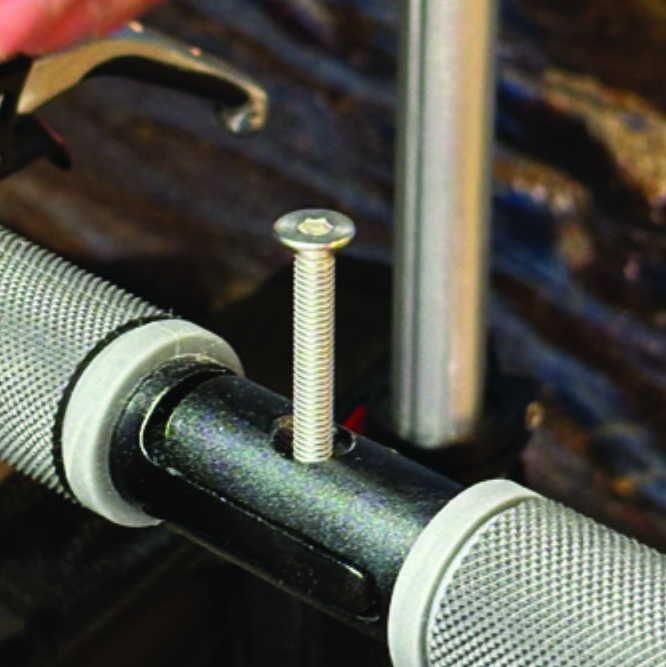
Replace the old screw with the longer screw included with the LED light. Attach the longer screw to the hinge and tighten it with the 4mm allen key.
B2. Replace the old screw with the longer screw included with the LED light. Attach the longer screw to the hinge and tighten it with the 4mm allen key.
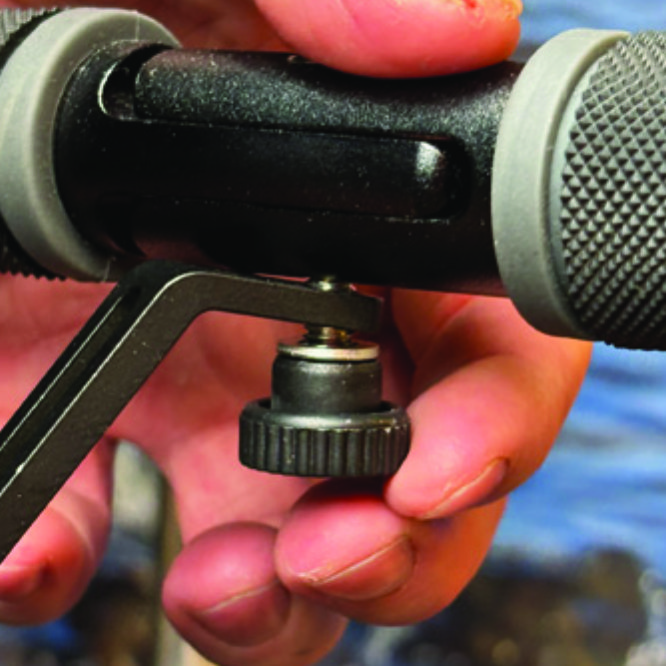
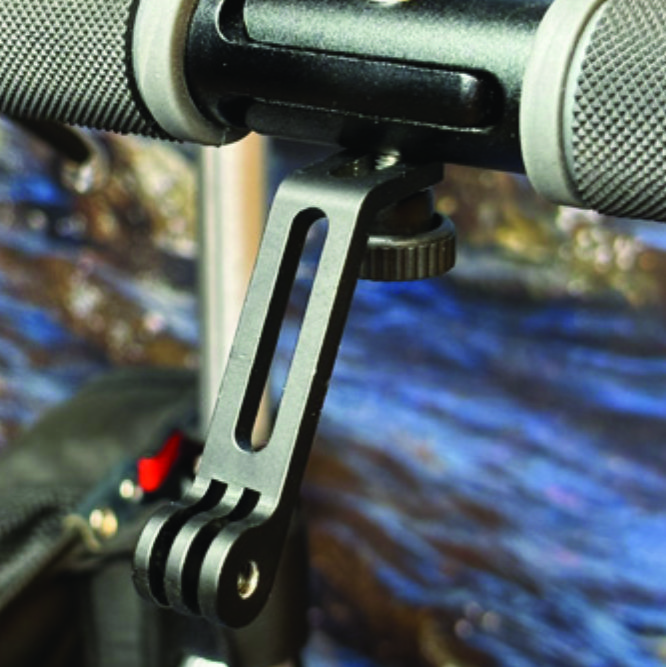
Attach the short angled end of the light holder to the lower end of the screw, on the downside of the grip bar. Fasten the holder with one washer and the knurled nut.
B3. Attach the short angled end of the light holder to the lower end of the screw, on the downside of the grip bar. Fasten the holder with one washer and the knurled nut.
For a more secure holder attachment, avoiding the holder to unintentionally turn sideways, replace the knurled nut with the included stainless steel nut and tighten it with a 10mm spanner.
B4. For a more secure holder attachment, avoiding the holder to unintentionally turn sideways, replace the knurled nut with the included stainless steel nut and tighten it with a 10mm spanner.
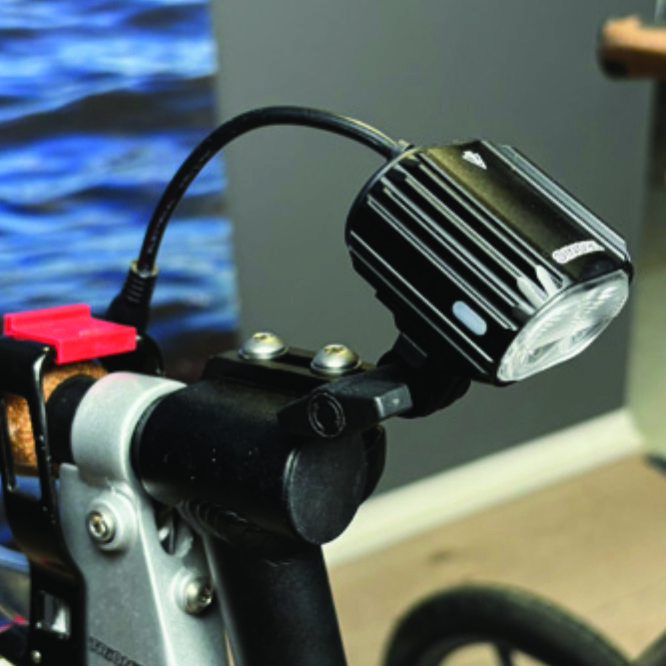
This photo shows the light holder as correctly attached.
B5. This photo shows the light holder as correctly attached.

Attaching the LED Light to the Holder

Instructions for a Walker
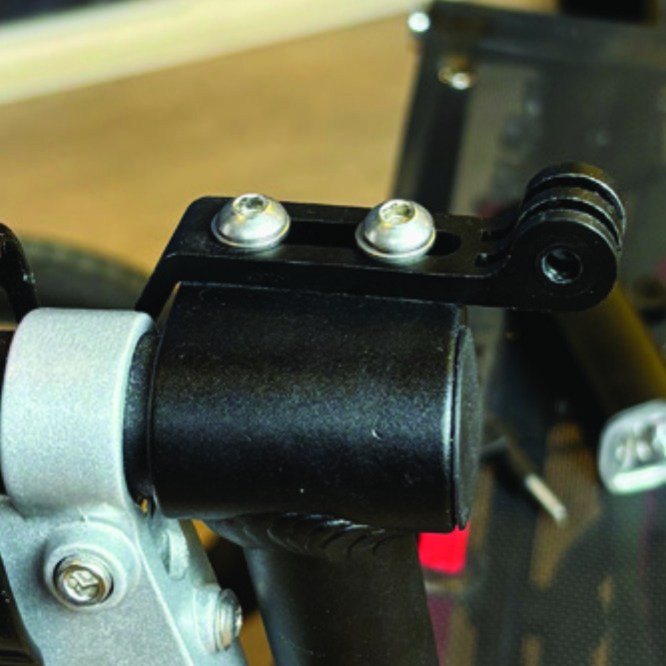
Identify the circular front end of the light holder, with two slots for attaching the light.
A6. Identify the circular front end of the light holder, with two slots for attaching the light.
Push the slotted bracket of the light into the slots of the holder and make sure they are aligned. Seen in the traveling direction of the Walker, enter the included wingnut from the left and tighten it.
A7. Push the slotted bracket of the light into the slots of the holder and make sure they are aligned. Seen in the traveling direction of the Walker, enter the included wingnut from the left and tighten it.

Instructions for a Veloped

Locate the screw at the center folding hinge of the U-shaped grip bar of the Veloped. Unscrew the screw with the included 4mm allen key and remove it.
B6. Locate the screw at the center folding hinge of the U-shaped grip bar of the Veloped. Unscrew the screw with the included 4mm allen key and remove it.
Identify the circular front end of the light holder, with two slots for attaching the light.
B7. Identify the circular front end of the light holder, with two slots for attaching the light.

Placing the Battery Pack

Instructions for a Walker
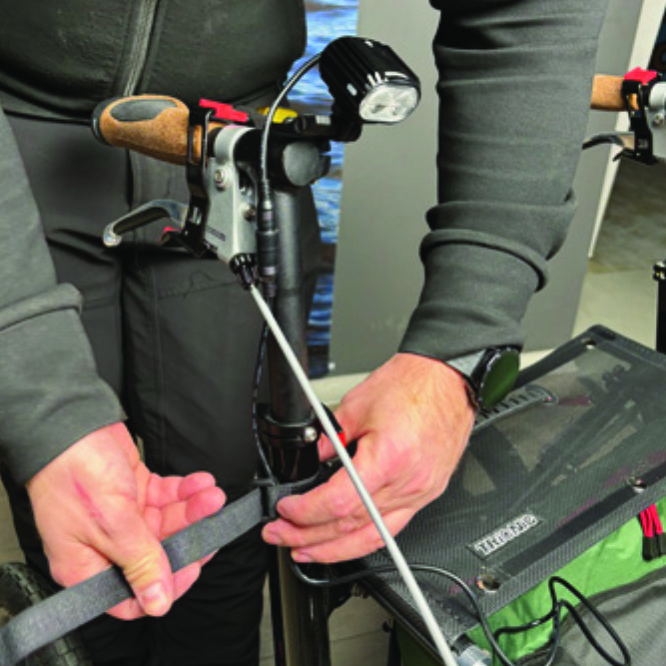
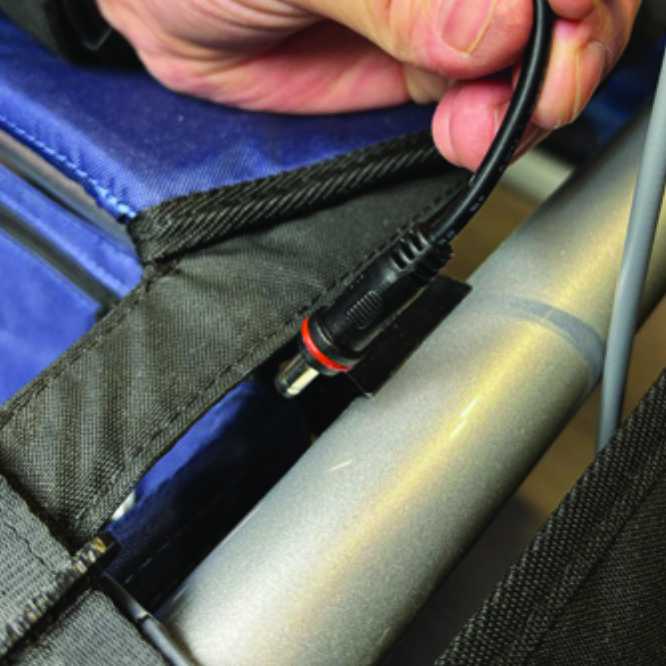
Run the longer extension cable along the semi-vertical grip tube of the Walker and secure it with the included velcro strap.
A8. Run the longer extension cable along the semi-vertical grip tube of the Walker and secure it with the included velcro strap.
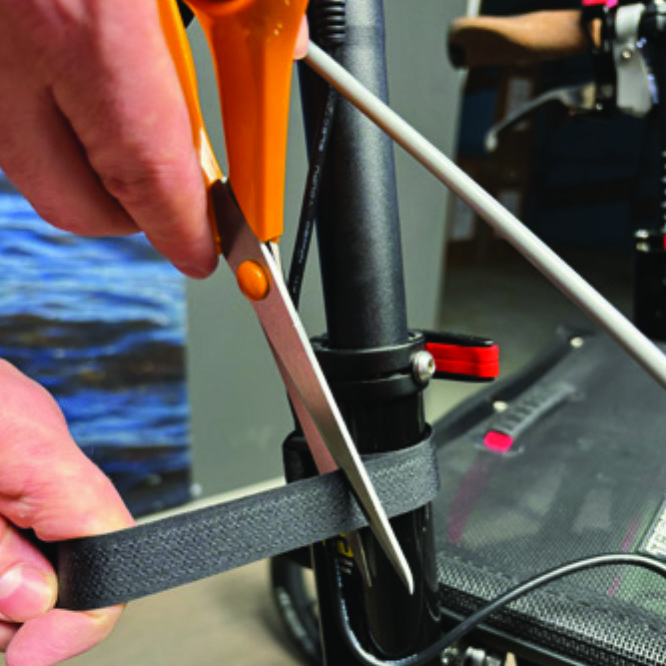
You can cut the excessive length of the velcro strap with a pair of scissors.
A9. You can cut the excessive length of the velcro strap with a pair of scissors.
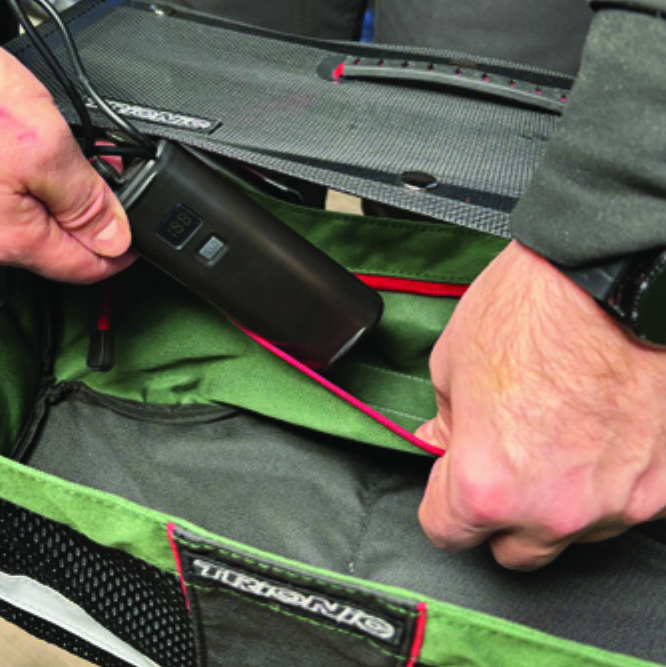
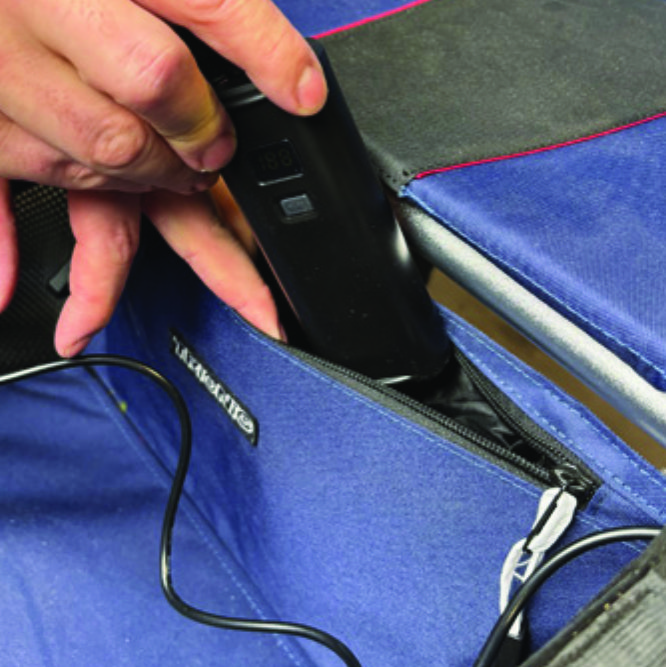
Place the battery pack in the rear zippered pocket of the basket.
A10. Place the battery pack in the rear zippered pocket of the basket.

Instructions for a Veloped

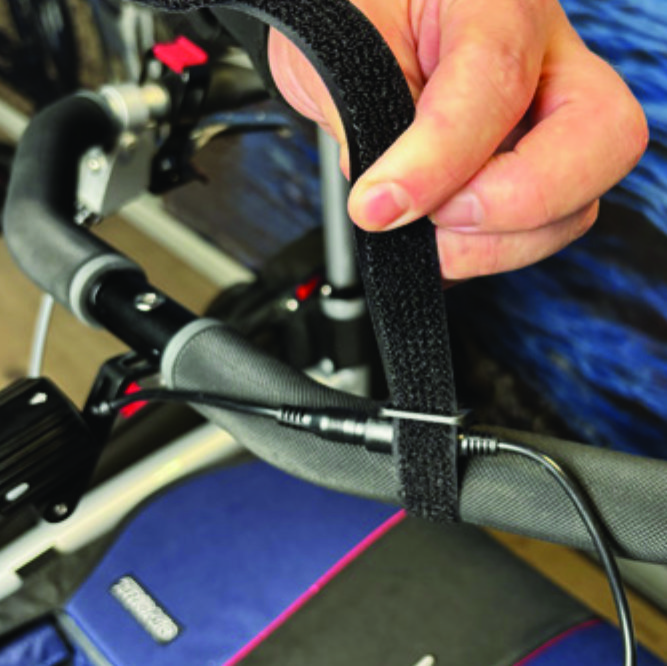
Run the longer extension cable along the U-shaped grip bar of the Veloped and secure it with the included velcro strap.
B8. Run the longer extension cable along the U-shaped grip bar of the Veloped and secure it with the included velcro strap.
You can cut the excessive length of the velcro strap with a pair of scissors.
B9. You can cut the excessive length of the velcro strap with a pair of scissors.
Place the battery pack in the rear zippered pocket of the basket.
B10. Place the battery pack in the rear zippered pocket of the basket.

The package contains

The package contains

How to operate the light

How to operate the light

Product Reviews    

  • Excellent customer service…

    I messed up the thread for the clamping screw on the brake lever. Customer service helped me in a very friendly and reliable manner. After a few days I received a replacement screw, but unfortunately the thread in the hole of the lever was worn out.

  • The best invention after the wheel…

    My husband had a very serious accident at work: he fell from a height of eight meters on concrete floor. He is still very young, and it would be a disaster to get him to walk with a typical walker. Firstly, it is unsafe and completely unergonomic, an…

  • Trionic Veloped Hunter…

    Very excellent service, highly recommended; the company is very accommodating. The Veloped is great!!!!…

  • Great product, great service.…

    As always with Trionic, I had great response to an inquiry about a replacement part for my Trionic rollator. I got a prompt response to my inquiry, quick identification of the part needed and immediate delivery. Great company, great products.…

  • It has been a couple of months now since I first got my Veloped Trek.…

    After a few weeks of use, my foot no longer hits the front wheel and the problem I had with navigating the unit in tight corners in the climbing mode has ceased. I suppose it was simply a matter of accustoming myself to the unit that resolved these m…

  • Vivien…

    The Veloped Trek has enabled me to visit the beach regularly- something I hadn’t been able to do for a long time. I have also been to an outdoor festival and was able to travel around the fields to see the stalls and the bands in the music tents. T…

    Veloped Trek 12er M navy/black/yellow
    by Vivien Morgan-Larcher
  • A great walking aid…

    The Veloped arrived well packed and in perfect condition within a very short time. It was super easy to set it up for use: it was ready in 5 minutes!
    My husband loves it and uses it every time he walks. Since then, he has been able to walk twice the…

  • Grateful Thanks.…

    My husband has osteoporosis of the spine. Purchasing the Trionic Veloped has made a wonderful difference to both our lives. My husband can now step out and walk in a much more upright position. I no longer have the anxiety that he may fall, or that w…

  • Excellent customer service…

    On the rare occasions I have had to contact this company they have been so helpful. Advising me how to remove parts etc. Their customer service really is 100 per cent.…

Subscribe to our newsletter!